Before we begin our How to WordPress on Mac localhost setup.
You can follow one of my previous posts with relation to loading the default apache and PHP without MAMP Support.
So let’s begin with WordPress on the Mac localhost step by step tutorial.
Explained this in this tutorial as I am doing each step one by one with proper screenshots, before we begin the text in red is what you can change with yours, rest is the commands that you may copy-paste easily.
Required A Mac, and MacOS
Install Sequel Pro On macOS
Download the nightly build package of sequel pro, tested with default package that did not work to connect the database,
Link to – Nightly build the package that worked correctly.
Download With the link given above.
Link to – Nightly build the package that worked correctly.
Download With the link given above.
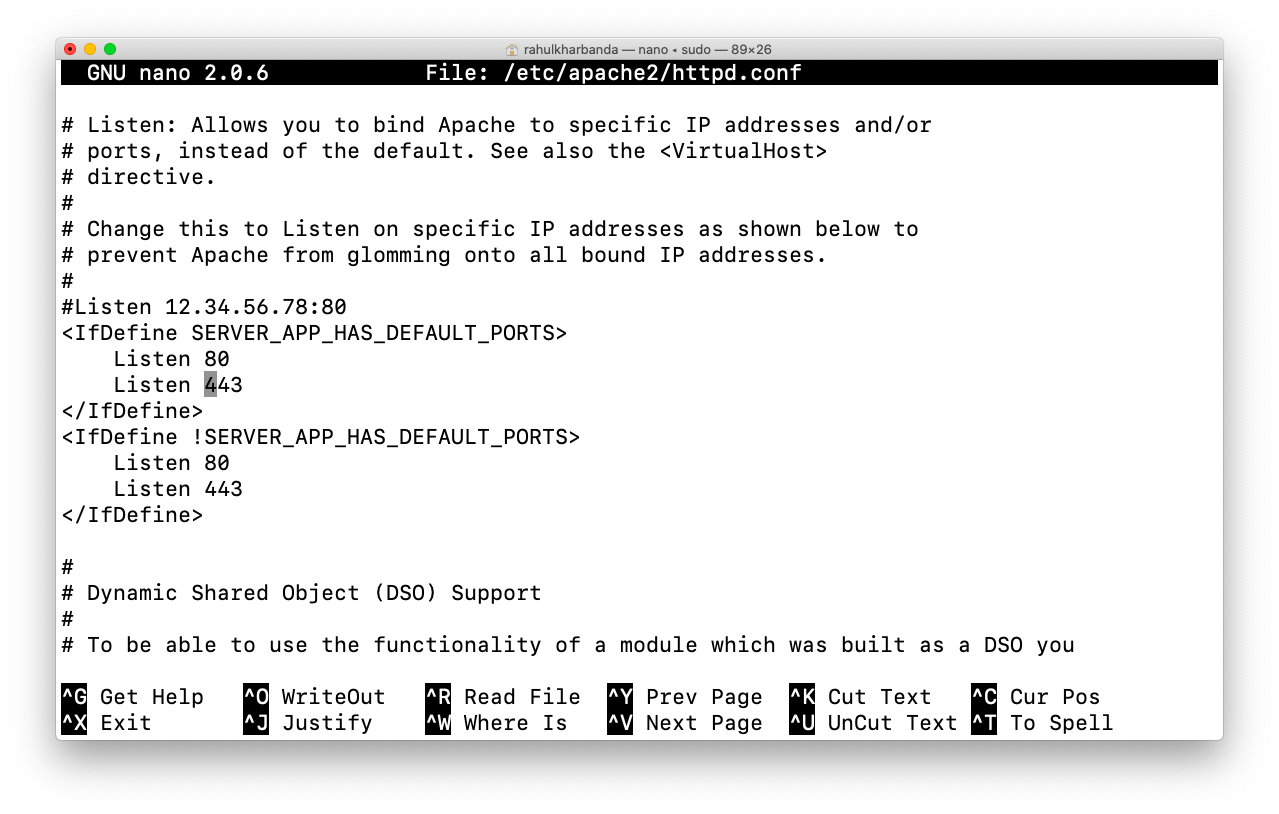
Check your Ports 80 & 443 both
TO ensure the ports are in the httpd.conf you may head towards the file with :
While in our next steps, we will change the Apache, Httpd everything to HomeBrew, so before that, we should make sure everything on the system is excellent.
Most of the time, I have gone through the forums where people get confused with the default apache that comes with the mac and custom installed via Homebrew, so to avoid any confusion, a basic knowledge of how the server works is a must to get.
and point to the ports line with ctrl+w and type 443 this should look like the same as above in the screenshot, with this configuration further you may delete or modify or add the port numbers as I have come across certain apps that work on specific ports,
I was not off the topic, but I think I dived a little deep into this, yes, as this is a crucial part to learn.
With this, you may check what ports are opened in your terminal by default both are open as in the virtual host setup in our previous post we had created separate ports for port 80 (for Non-SSL / HTTP) and 443 (for SSL / HTTPS )
You will get the result as:
with the PID’s and all the things running on the mac or your IP address, I added this step to ensure the ports are working and everything is good till now.
Next for the test run :
In case you face any errors :
(48)Address already in use: AH00072: make_sock: could not bind to address [::]:80
You will have to find out the running PID’s and kill them, to find run :
or
as per the error you have got on port 443 or 80, running this will show you some of the PID’s you need to kill, to the number connected with the ROOT user
so if you see :
httpd 9420 root 4u IPv6
so our command will be simply
This command will kill all as its root httpd
Now-Again Test with
I assume everything is working fine so that we proceed further. With every new edit on the conf files, it’s essential to restart the apache. The significant part is syntax. If it contains any error, not ok will always show the error whats wrong with your syntax.
Note: In our next step, we will not use the default apache and unload the same would ensure that no issues prevail on the projects we make after the macOS regular updates.
The above steps helped you with understanding the difference between the default apache and the one that is in a separate directory.
sudo nano /etc/apache2/httpd.confWhile in our next steps, we will change the Apache, Httpd everything to HomeBrew, so before that, we should make sure everything on the system is excellent.
Most of the time, I have gone through the forums where people get confused with the default apache that comes with the mac and custom installed via Homebrew, so to avoid any confusion, a basic knowledge of how the server works is a must to get.
and point to the ports line with ctrl+w and type 443 this should look like the same as above in the screenshot, with this configuration further you may delete or modify or add the port numbers as I have come across certain apps that work on specific ports,
I was not off the topic, but I think I dived a little deep into this, yes, as this is a crucial part to learn.
sudo lsof -i -n -P | grep TCPWith this, you may check what ports are opened in your terminal by default both are open as in the virtual host setup in our previous post we had created separate ports for port 80 (for Non-SSL / HTTP) and 443 (for SSL / HTTPS )
You will get the result as:
TCP *:443 (LISTEN)with the PID’s and all the things running on the mac or your IP address, I added this step to ensure the ports are working and everything is good till now.
Next for the test run :
sudo apachectl gracefulIn case you face any errors :
(48)Address already in use: AH00072: make_sock: could not bind to address [::]:80
You will have to find out the running PID’s and kill them, to find run :
sudo lsof -i:80or
sudo lsof -i:443as per the error you have got on port 443 or 80, running this will show you some of the PID’s you need to kill, to the number connected with the ROOT user
so if you see :
httpd 9420 root 4u IPv6
so our command will be simply
sudo kill 9420This command will kill all as its root httpd
Now-Again Test with
sudo apachectl graceful
sudo apachectl stop
sudo apachectl start
sudo apachectl restart
I assume everything is working fine so that we proceed further. With every new edit on the conf files, it’s essential to restart the apache. The significant part is syntax. If it contains any error, not ok will always show the error whats wrong with your syntax.
Note: In our next step, we will not use the default apache and unload the same would ensure that no issues prevail on the projects we make after the macOS regular updates.
The above steps helped you with understanding the difference between the default apache and the one that is in a separate directory.
Setting up Homebrew
As per the official website, Homebrew installs packages to their directory and then symlinks their files into /usr/local.
will take some time to install
Why not the default Apache directory for WordPress on mac?
macOS Catalina or any previous versions come with Apache already installed. We will not use the delivered or default version as it’s connected to updates and other things Apple may require in the future and can create problems in development if the configuration that is customised changes. To do this easily without any issues, we will install mostly everything with the help of Homebrew. Configure it to run on the port 80 or 443 as per the need of an application.
So we should first stop the Apache running by default and unload the same :
Now run these commands one by one to add directories and permissions :
You can add staff following a step below, or for the time being you can also use your default set user group and name.
These are the directories we will require in our tutorial steps on setting up WordPress on mac.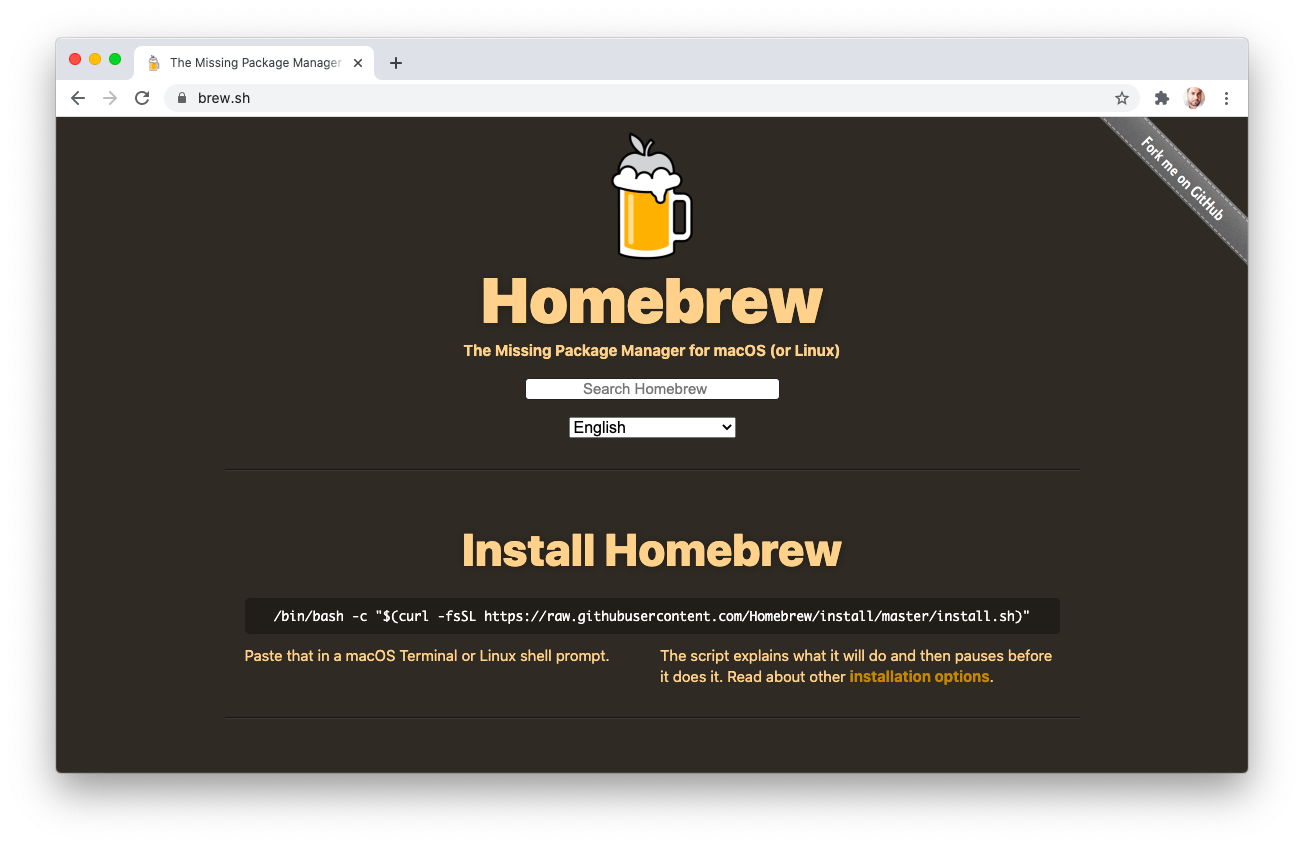
ruby -e "$(curl -fsSL https://raw.githubusercontent.com/Homebrew/install/master/install)"will take some time to install
Why not the default Apache directory for WordPress on mac?
macOS Catalina or any previous versions come with Apache already installed. We will not use the delivered or default version as it’s connected to updates and other things Apple may require in the future and can create problems in development if the configuration that is customised changes. To do this easily without any issues, we will install mostly everything with the help of Homebrew. Configure it to run on the port 80 or 443 as per the need of an application.
So we should first stop the Apache running by default and unload the same :
sudo apachectl stopsudo launchctl unload -w /System/Library/LaunchDaemons/org.apache.httpd.plist 2>/dev/nullNow run these commands one by one to add directories and permissions :
sudo mkdir /usr/local/log
sudo mkdir /usr/local/log/httpd
sudo chgrp -R staff /usr/local/log/httpd
sudo chmod -R ug+w /usr/local/log/httpd/You can add staff following a step below, or for the time being you can also use your default set user group and name.
These are the directories we will require in our tutorial steps on setting up WordPress on mac.
Install httpd with Brew
brew install httpdThis command will install httpd for you quickly.
Start and restart the httpd on a brew with :
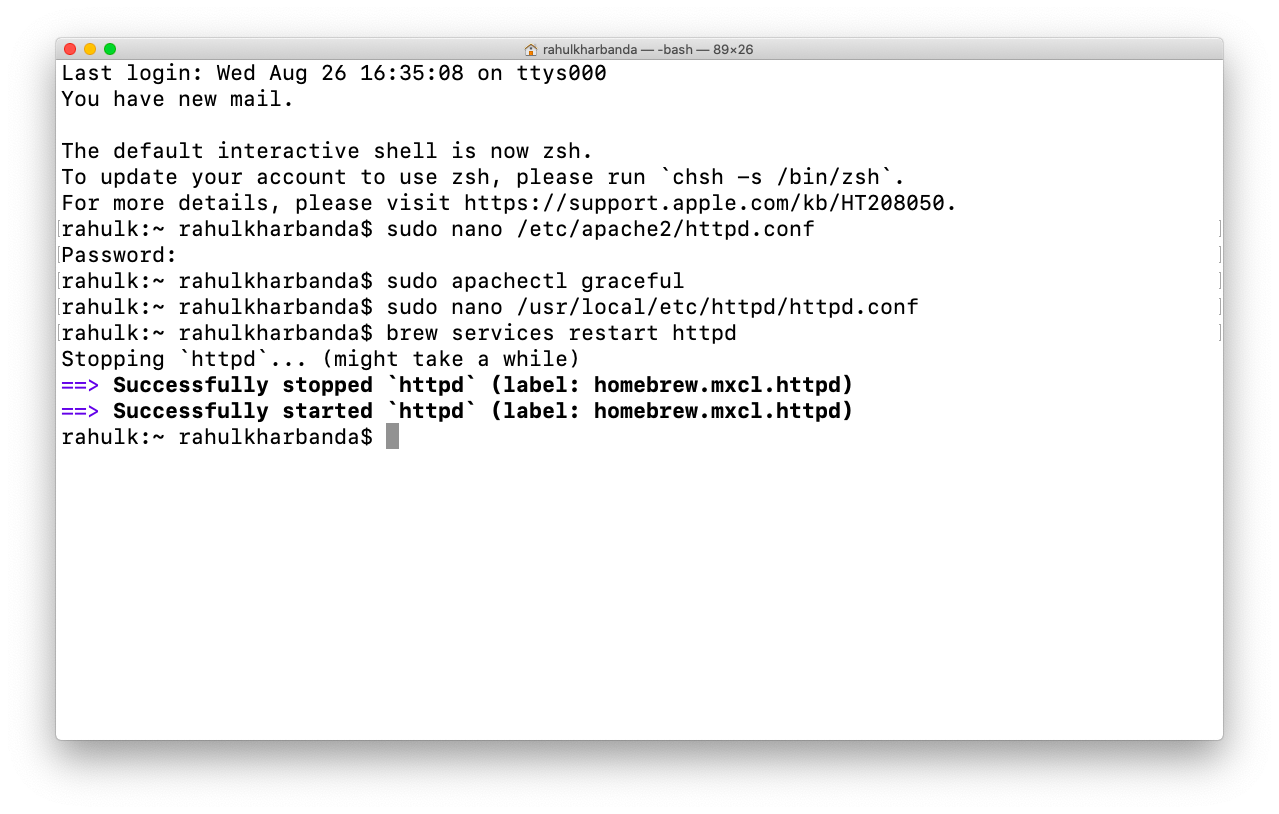
brew services start httpd
brew services restart httpd
To ensure everything is fine!
Like we did in our previous posts you will have to edit httpd, the new one and make some changes to httpd.conf file:
sudo nano /usr/local/etc/httpd/httpd.conf
after running the above command in your terminal press ctrl+w to search for, add or uncomment the # :Listen 80
Listen 443
LoadModule deflate_module lib/httpd/modules/mod_deflate.so
LoadModule rewrite_module lib/httpd/modules/mod_rewrite.so
ServerName localhost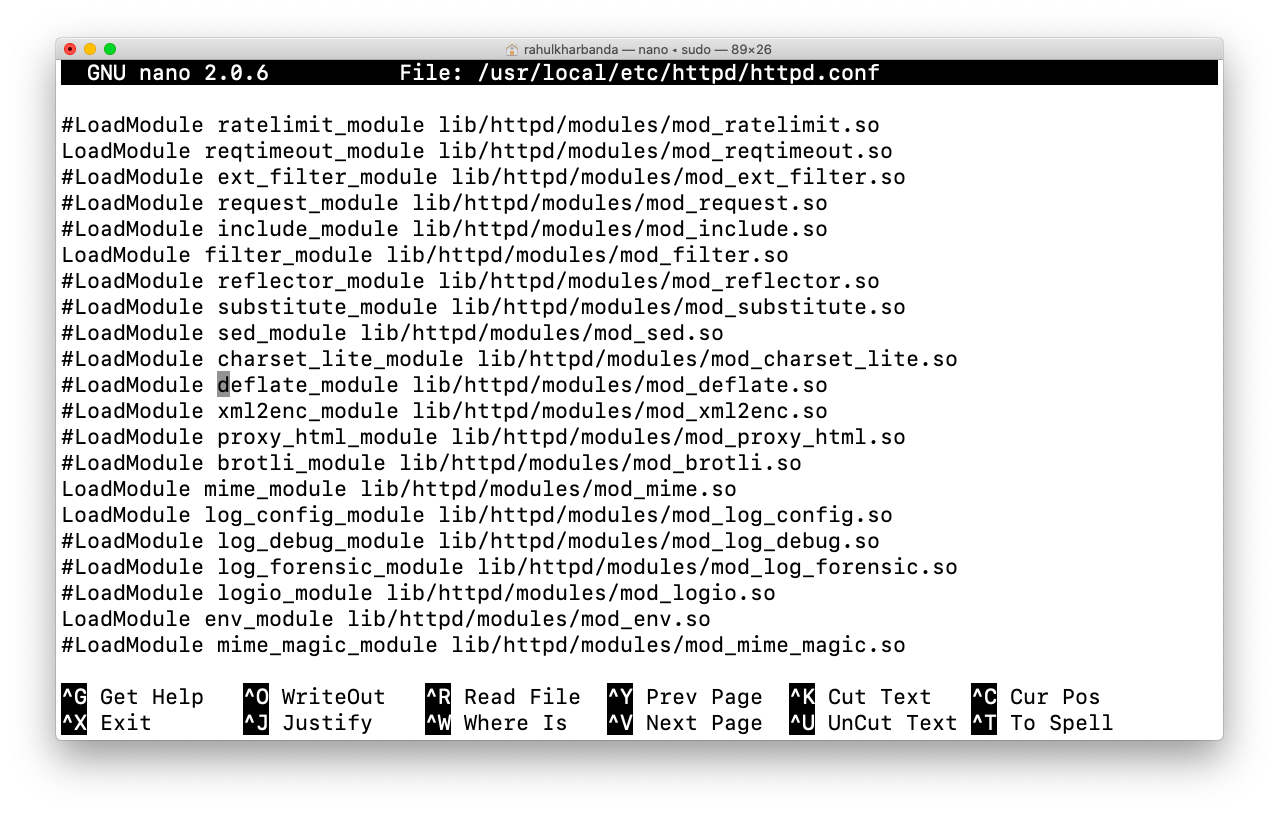 You must add your username, as a user don’t touch the default _www or it will give an error later what I mean is this :
Usernames:
User yourname
Group staff
Document Root & Directory
DocumentRoot "/Users/yourname/Sites"
<Directory "/Users/yourname/Sites">
Permissions
AllowOverride All
require all granted
Error Log
ErrorLog "/usr/local/log/httpd/error_log"
After editing the file press ctrl+o to write out and ctrl+x to exit, to make sure we have done everything with no mistakes we will restart the apache withsudo apachectl -k restartTesting the Localhost with a PHP File
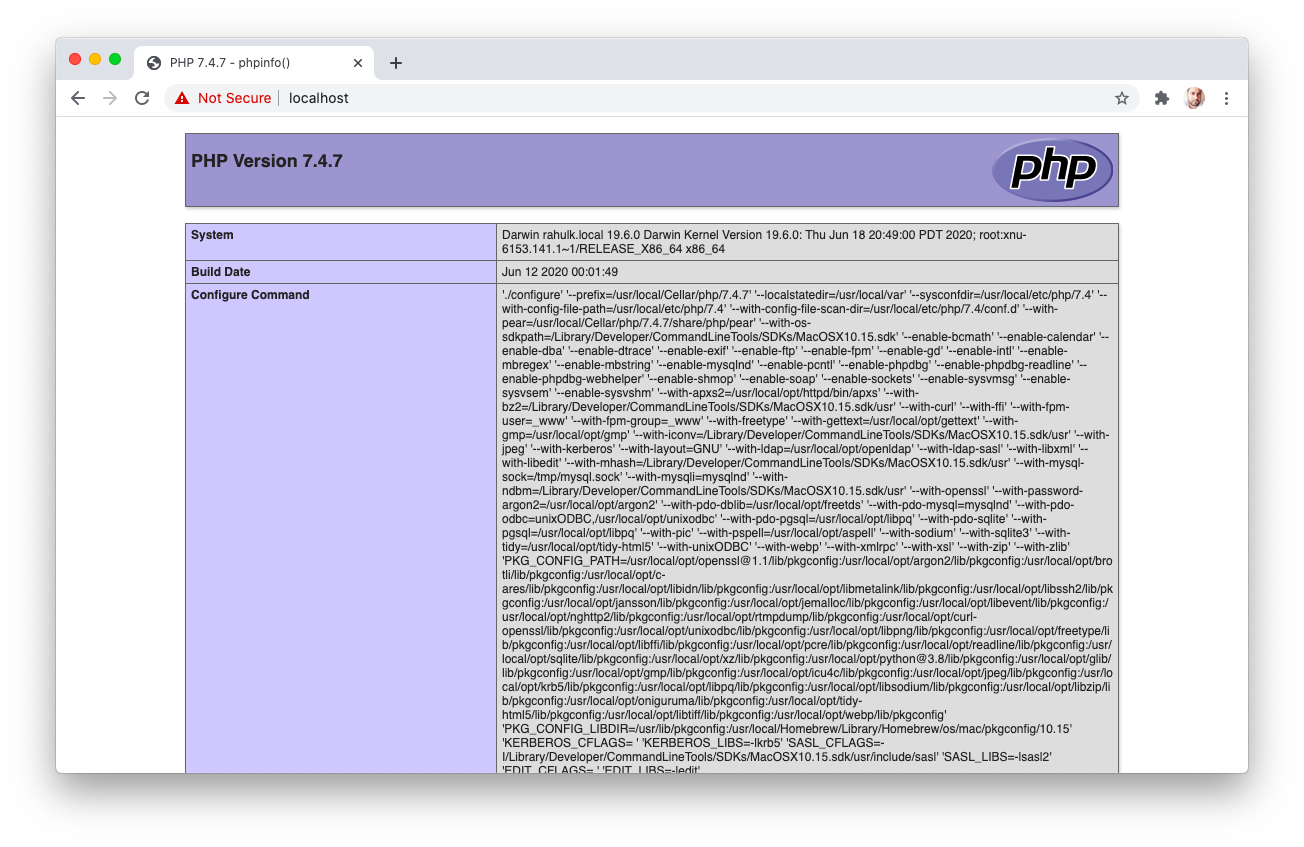
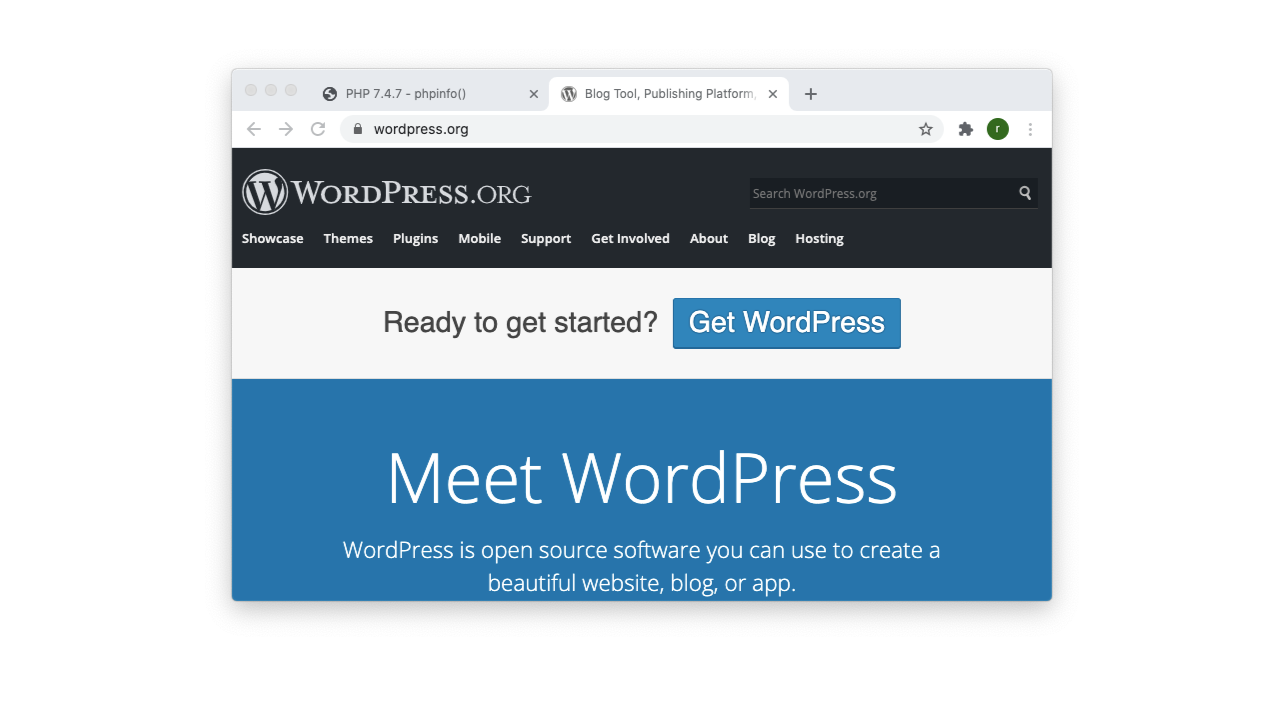
Put this PHP code in an index.php file.
in your sites folder once done, you can check this by going to your browser or http://localhost
What if you get 403 Forbidden Error?
Firstly you have to check each step above with all the permissions, mostly terms like AllowOverride All, require all granted could be a reason.
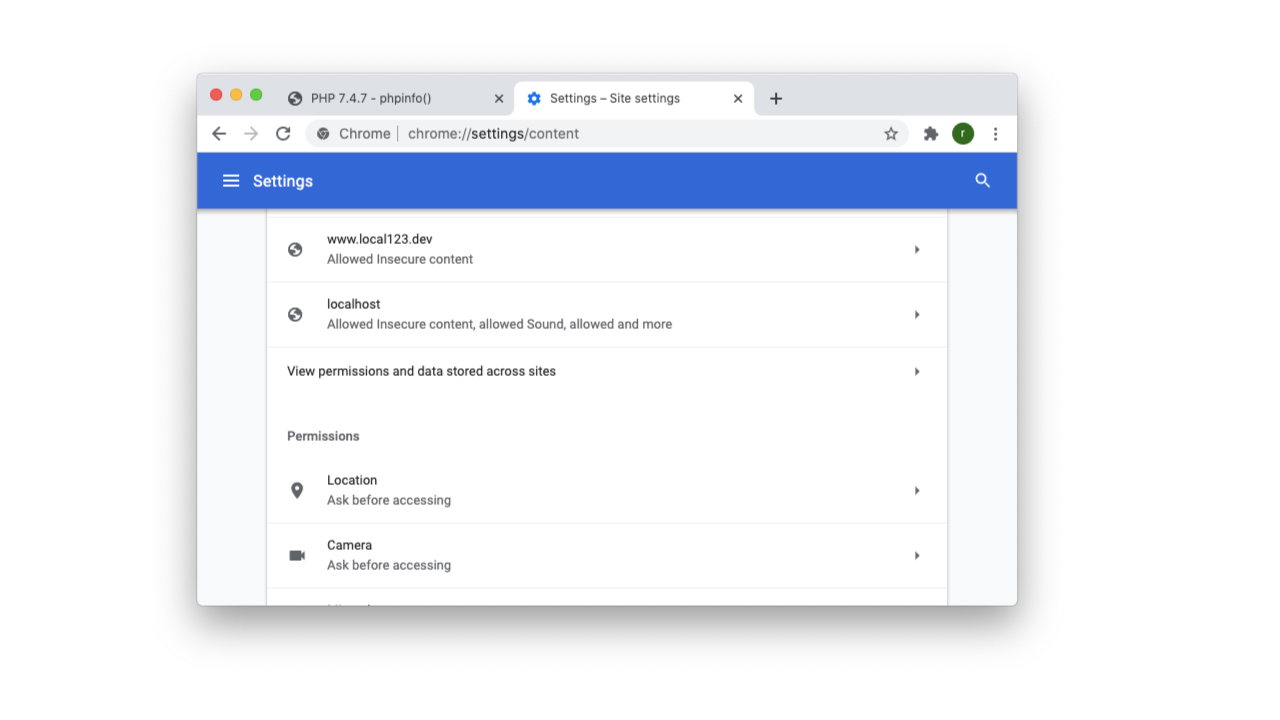
In chrome and other browsers, if you will try to use a renowned domain on the localhost that will throw an error as that may be in the HSTS list of chrome already, so its best to use your name or localhost.
Another problem you may also solve by going to the chromes ” Site-Settings” and allowing everything from the localhost.
My screenshot with PHP shows https being I had SSL installed on my server already on one of my ongoing projects also installing SSL I am adding in steps below, so keep following.
<?php phpinfo();in your sites folder once done, you can check this by going to your browser or http://localhost
What if you get 403 Forbidden Error?
Firstly you have to check each step above with all the permissions, mostly terms like AllowOverride All, require all granted could be a reason.
In chrome and other browsers, if you will try to use a renowned domain on the localhost that will throw an error as that may be in the HSTS list of chrome already, so its best to use your name or localhost.
Another problem you may also solve by going to the chromes ” Site-Settings” and allowing everything from the localhost.
My screenshot with PHP shows https being I had SSL installed on my server already on one of my ongoing projects also installing SSL I am adding in steps below, so keep following.
Set up Virtual Host Map Domain
You can use anything you may wish, www.yourname.com
So let us begin, I have already given some detailed thing about Virtual Hosts on the local environment in my post.
First, we will map this with our localhost as a Domain :
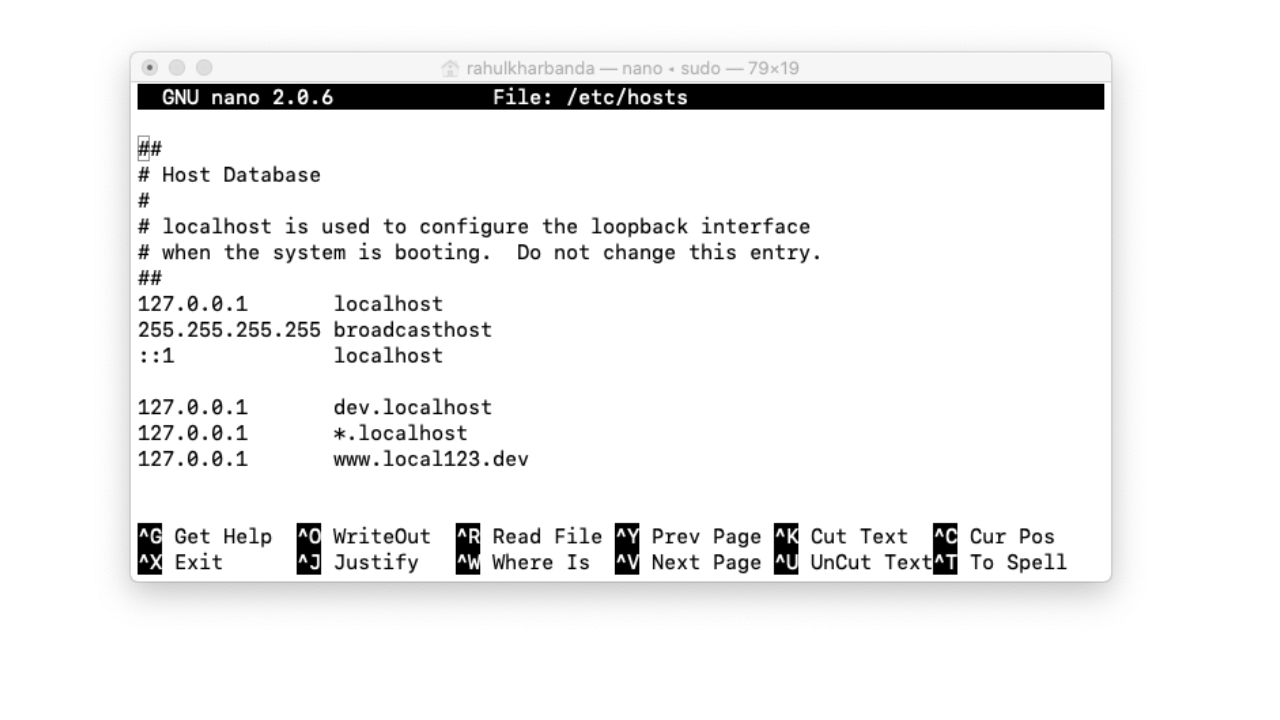 As in the image above.
Now as we have this file as our httpd.conf, copy the below command, and start editing :
Remember to find its “ctrl+w” and to write its “ctrl+o” and exit is “ctrl+x”
So now quickly we will just make sure you have :
Server Name as localhost
No # tag at the beginning of these lines you should find each one individually :
Once Done restart the apache
On the Virtual Host Just Copy Paste With Changing Your Red Highlighted
So let us begin, I have already given some detailed thing about Virtual Hosts on the local environment in my post.
First, we will map this with our localhost as a Domain :
sudo nano /etc/hostsAs in the image above.Now as we have this file as our httpd.conf, copy the below command, and start editing :
sudo nano /usr/local/etc/httpd/httpd.confRemember to find its “ctrl+w” and to write its “ctrl+o” and exit is “ctrl+x”
So now quickly we will just make sure you have :
Server Name as localhost
ServerName localhostNo # tag at the beginning of these lines you should find each one individually :
LoadModule vhost_alias_module libexec/apache2/mod_vhost_alias.so
Include /usr/local/etc/httpd/extra/httpd-vhosts.conf
LoadModule socache_shmcb_module lib/httpd/modules/mod_socache_shmcb.so
LoadModule ssl_module lib/httpd/modules/mod_ssl.so
Include /usr/local/etc/httpd/extra/httpd-ssl.conf
Once Done restart the apache
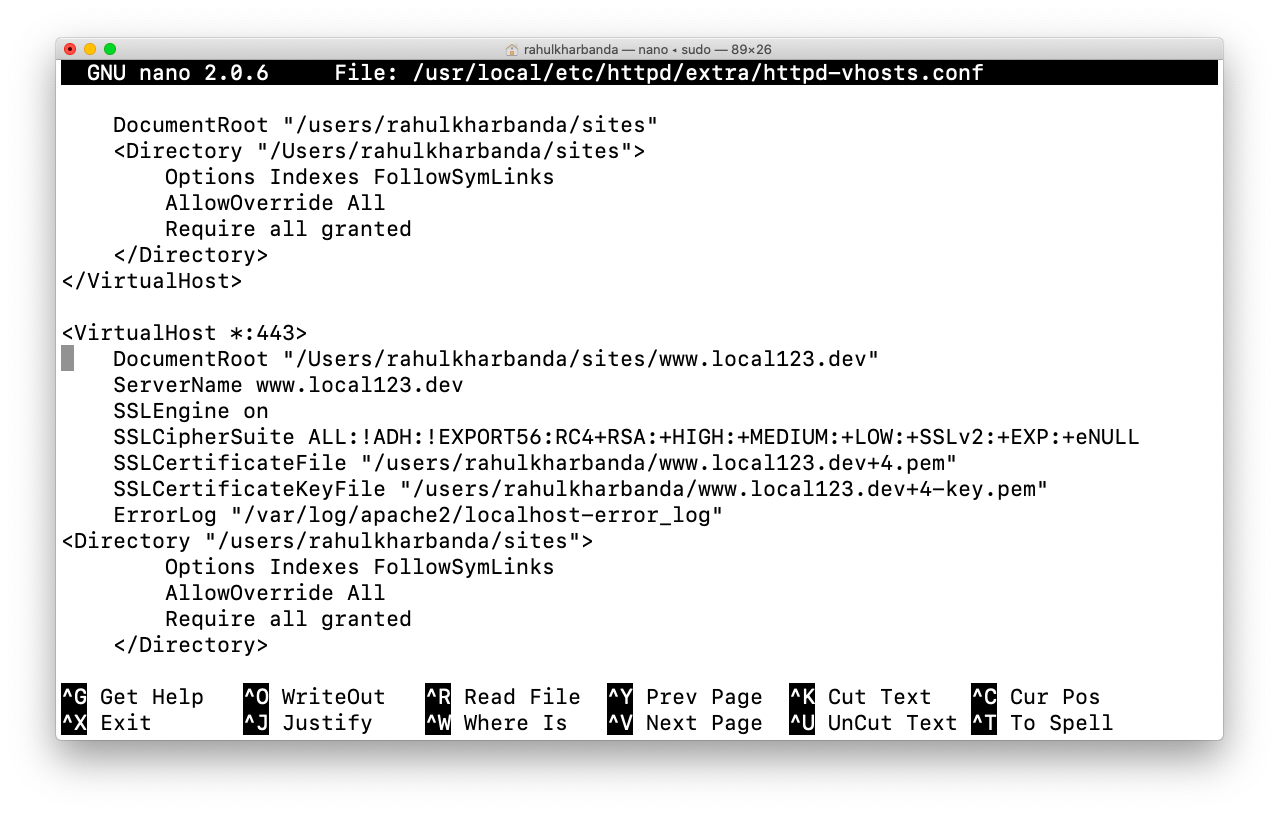
sudo apachectl restartOn the Virtual Host Just Copy Paste With Changing Your Red Highlighted
sudo nano /usr/local/etc/httpd/extra/httpd-vhosts.conf<VirtualHost *:443>
DocumentRoot "/Users/yourname/sites"
ServerName www.yourname.com
SSLEngine on
SSLCipherSuite ALL:!ADH:!EXPORT56:RC4+RSA:+HIGH:+MEDIUM:+LOW:+SSLv2:+EXP:+eNULL
SSLCertificateFile "/users/yourname/www.yourname.com+4.pem"
SSLCertificateKeyFile "/users/yourname/www.yourname.com+4-key.pem"
ErrorLog "/var/log/apache2/localhost-error_log"
<Directory "/users/yourname/sites">
Options Indexes FollowSymLinks
AllowOverride All
Require all granted
</Directory>
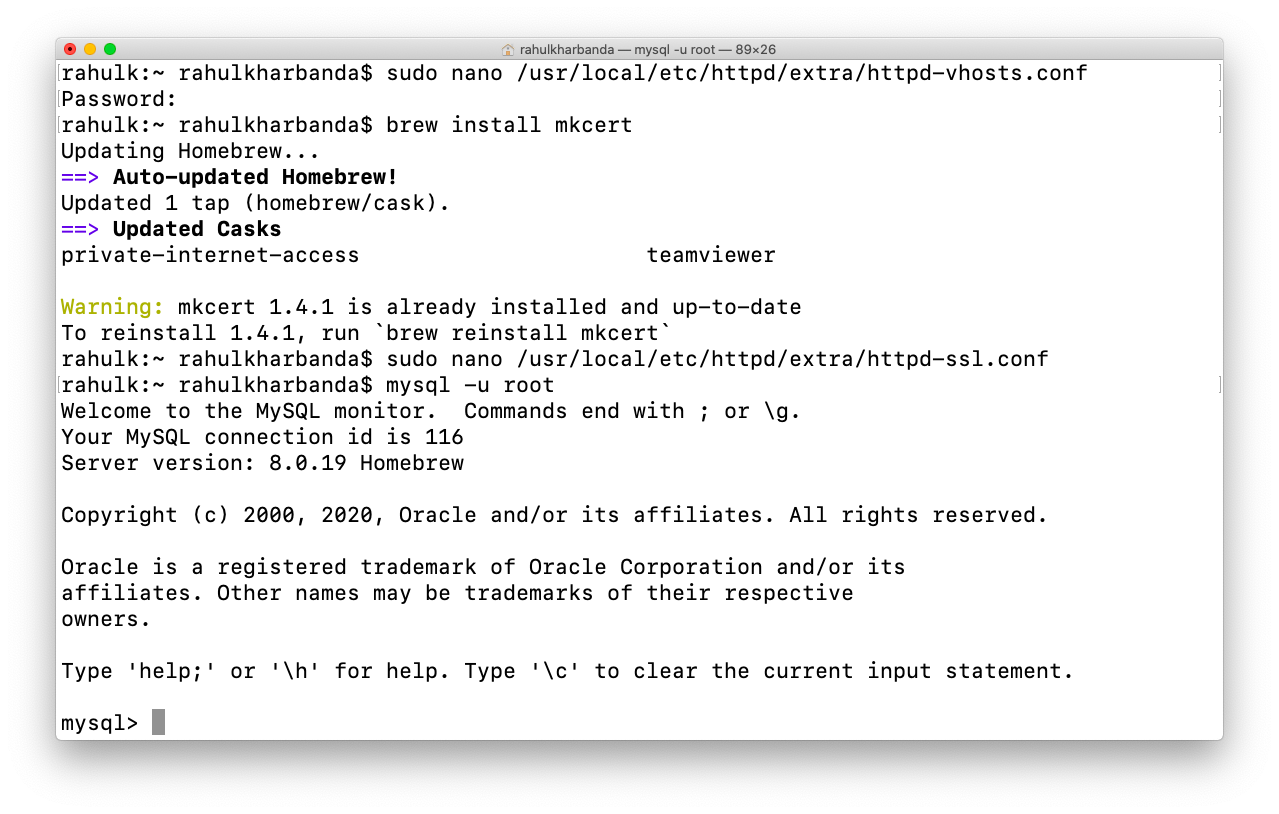
</VirtualHost>Set up SSL HTTPS with mkcert on Homebrew
Simply
Next :
This will install local CA
This is an important command now :
This will install all the certificates using the local CA Saved at the previous step, the *.yourname.com is a wildcard for subdomains of your projects in case.
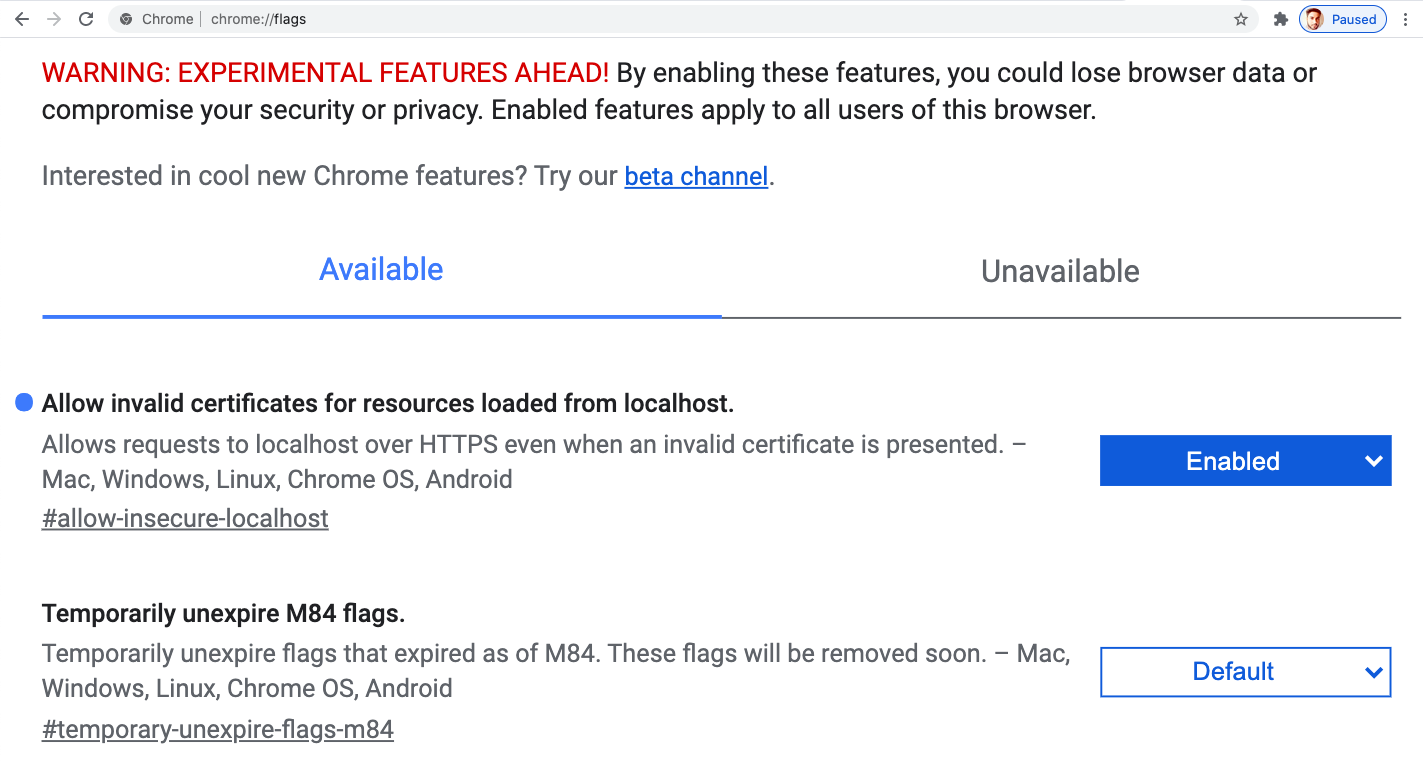
In the latest version of Chrome, you should be able to enable SSL, go to chrome://flags to enable, If you have any problem with SSL
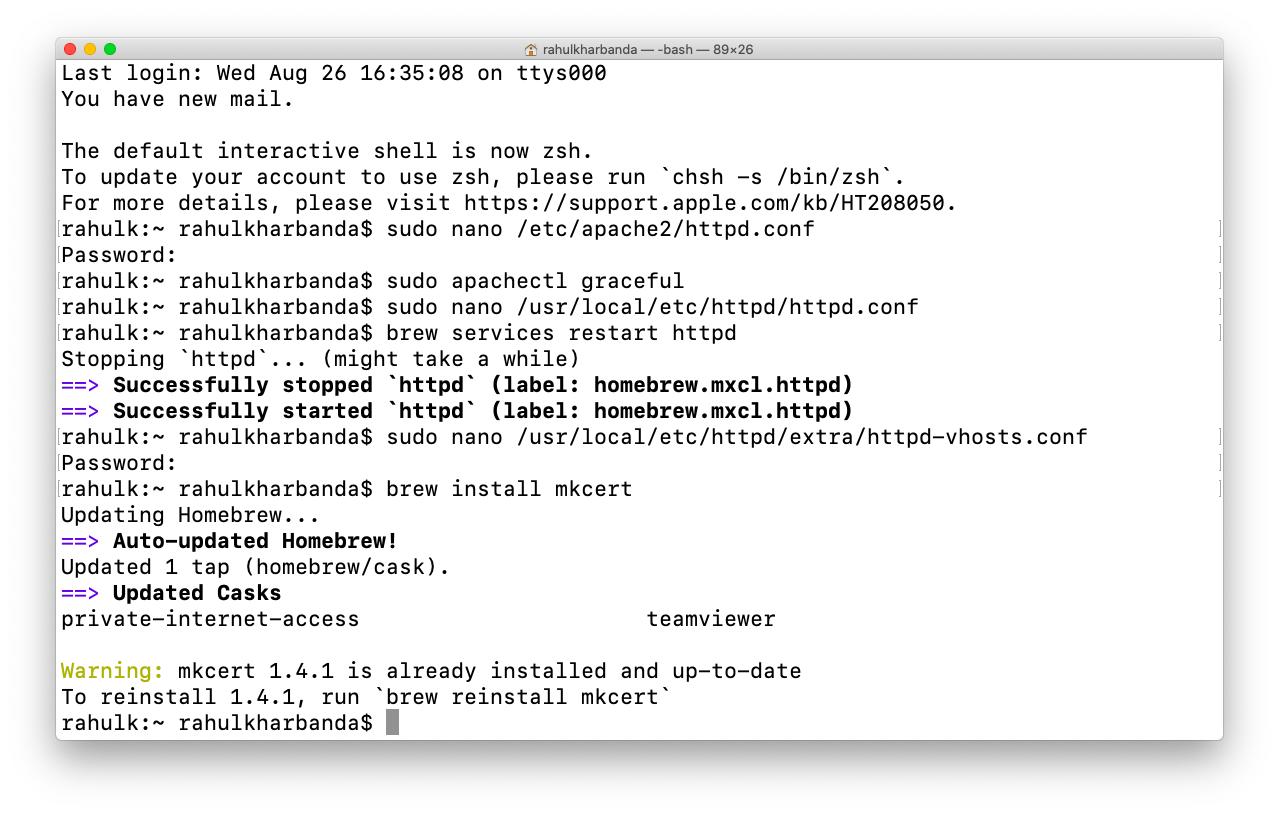
brew install mkcertNext :
mkcert -installThis will install local CA
This is an important command now :
mkcert yourname.com "*.yourname.com" This will install all the certificates using the local CA Saved at the previous step, the *.yourname.com is a wildcard for subdomains of your projects in case.
In the latest version of Chrome, you should be able to enable SSL, go to chrome://flags to enable, If you have any problem with SSL
Create SSL Links Between Local Server Virtual Host
The files at the virtual host should be :
go to
and add :
go to
sudo nano /usr/local/etc/httpd/extra/httpd-vhosts.confand add :
SSLCertificateFile "/users/yourname/www.yourname.com+4.pem"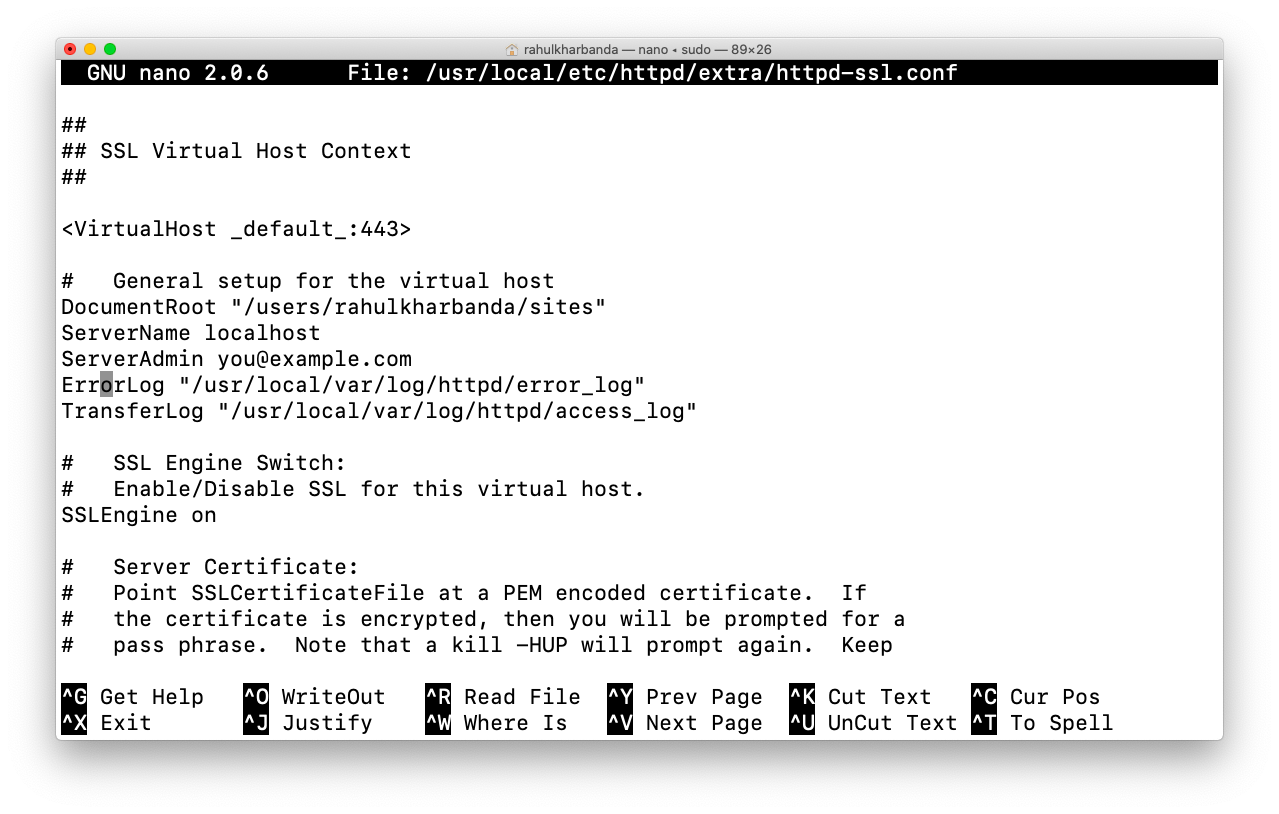
SSLCertificateKeyFile "/users/yourname/www.yourname.com+4-key.pem"Add SSL Location to ssl.conf file
sudo nano /usr/local/etc/httpd/extra/httpd-ssl.confSSLCertificateFile "/users/yourname/www.yourname.com+4.pem"
SSLCertificateKeyFile "/users/yourname/www.yourname.com+4-key.pem"Once saved restart
sudo apachectl restartNow head over to your localhost or the domain you have set with a “Lock” as SSL visible, successfully you have added the SSL Certificate.
The Domain also has an SSL now, so it’s done.
Set Up MySQL database Manage With Sequel Pro
Let’s start with setting up MySql, I hope you have downloaded the same from the previous post
As we have already installed sequel pro on the mac you still can do that by
With these commands, MySQL has been installed and root user without any password.
Just to set up the encoding right, log in to MySql
This will return as mysql> when you are logged in
To change the Password encoding simply add this command :
Once done Just type “Exit” and it will return with a Bye.
Just to test everything and make sure everything is correct we will restart
Also, we will start the MySql Server with
This will return with
Starting MySQL
SUCCESS!
Now open the Sequel Pro Nightly Build we have explained in the initial steps of the tutorial setting up WordPress on mac with SSL step by step
This is the default screen of Sequel pro now let’s create a new table with the “+” icon at the left end corner of the App.
We made this as a name netnaps you may create anything you want
With these inputs :
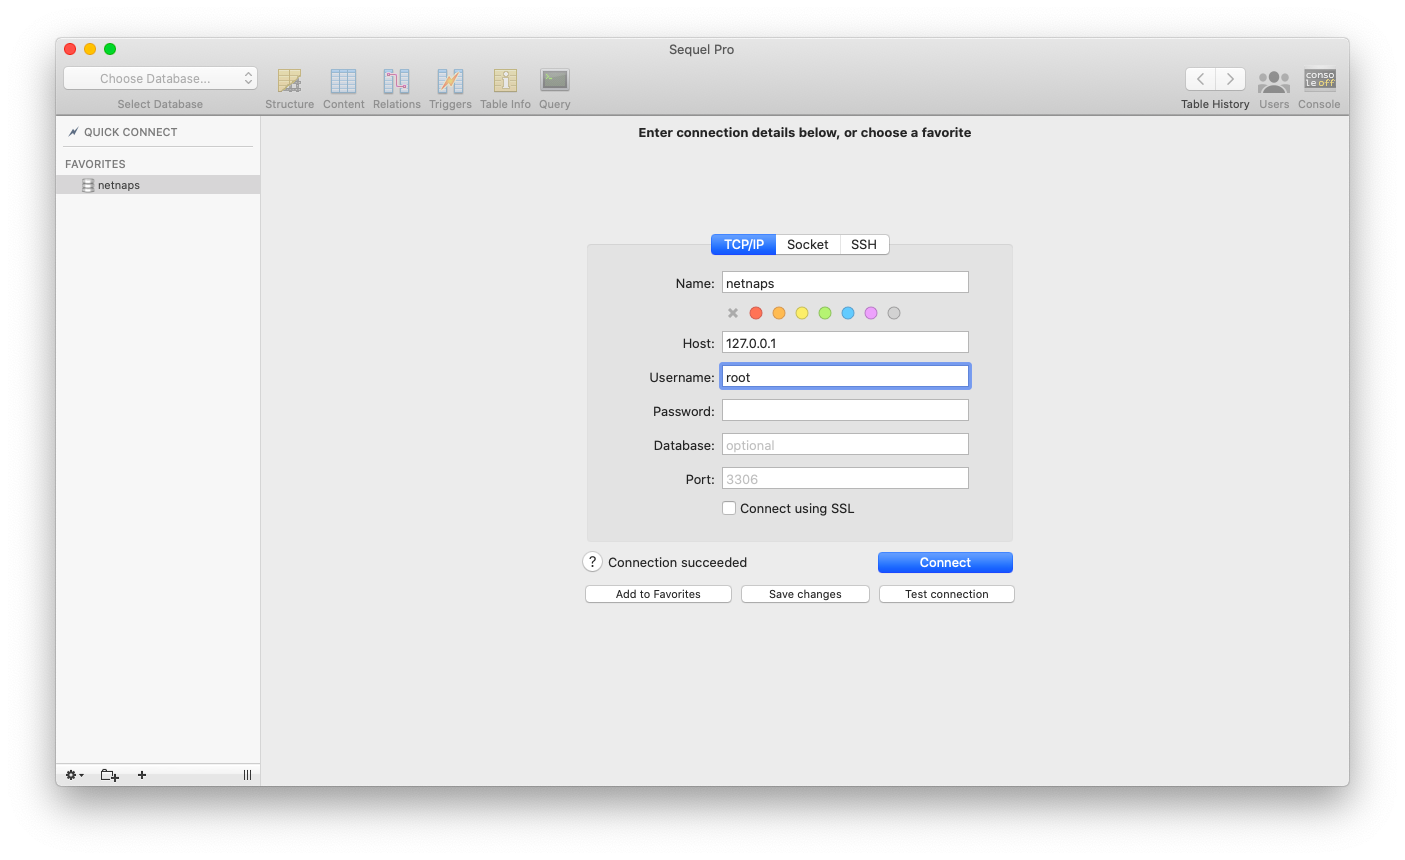
Name: localhost or your domain you have set in the above steps
Host : 127.0.0.1
Username: root
we will connect the same after you press connect you may easily create a database that is blank for the WordPress Setup, the database must have a prefix as ” wp_ ” as in the default WordPress config file wp-config.php we have the prefix as “wp”
With add database as an option, we will create “wp_local”, you can also see a list of other tables if you have created some before below in the same menu.
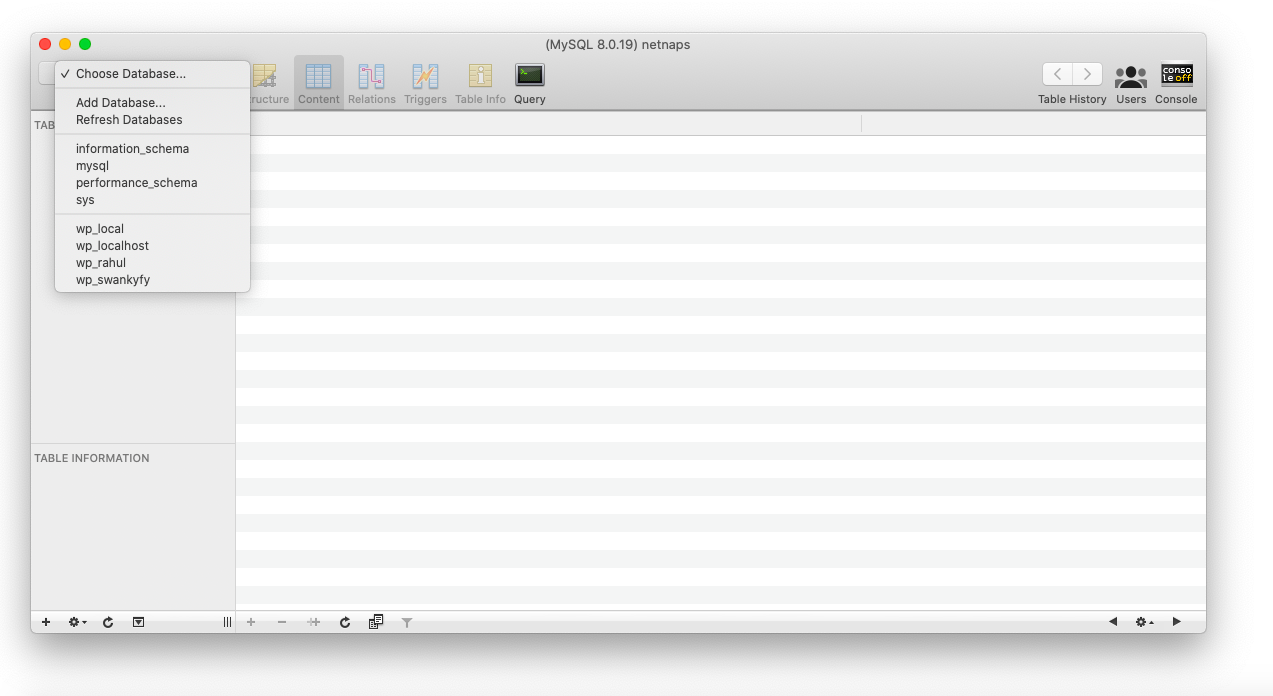
when you create just keep everything as default only give a name to the table.
brew install mysqlAs we have already installed sequel pro on the mac you still can do that by
brew cask install sequel-proWith these commands, MySQL has been installed and root user without any password.
Just to set up the encoding right, log in to MySql
mysql -u rootThis will return as mysql> when you are logged in
To change the Password encoding simply add this command :
ALTER USER 'root'@'localhost' IDENTIFIED WITH mysql_native_password BY '';Once done Just type “Exit” and it will return with a Bye.
Just to test everything and make sure everything is correct we will restart
sudo apachectl restartAlso, we will start the MySql Server with
mysql.server startThis will return with
Starting MySQL
SUCCESS!
Now open the Sequel Pro Nightly Build we have explained in the initial steps of the tutorial setting up WordPress on mac with SSL step by step
This is the default screen of Sequel pro now let’s create a new table with the “+” icon at the left end corner of the App.
We made this as a name netnaps you may create anything you want
With these inputs :
Name: localhost or your domain you have set in the above steps
Host : 127.0.0.1
Username: root
we will connect the same after you press connect you may easily create a database that is blank for the WordPress Setup, the database must have a prefix as ” wp_ ” as in the default WordPress config file wp-config.php we have the prefix as “wp”
With add database as an option, we will create “wp_local”, you can also see a list of other tables if you have created some before below in the same menu.
when you create just keep everything as default only give a name to the table.
Setting Up WordPress Latest
By now we have got everything running we have a local server on mac for WordPress on mac possibilities are endless, endless projects can be made with just tweaking some virtual hosts, .config files,
As we also have the SSL our next post will cover everything about setting up AMP on WordPress.
So let us begin with a simple brew command
this will return with this or whatever at that time it would be
/usr/local/Cellar/wp-cli/2.4.0: 3 files, 5.3MB, built in 5 seconds
We will make a new directory for our new website with a simple command
Get the permissions for the directory as the user with
and
remember we had also done this in the steps above
We will enter the same directory before we download the WordPress files in that
Once in the Directory, we will download the core package :
Success: WordPress downloaded. This will what you will see once download is done it takes around less than 10 seconds.
As we also have the SSL our next post will cover everything about setting up AMP on WordPress.
So let us begin with a simple brew command
brew install wp-clithis will return with this or whatever at that time it would be
/usr/local/Cellar/wp-cli/2.4.0: 3 files, 5.3MB, built in 5 seconds
We will make a new directory for our new website with a simple command
sudo mkdir /users/rahulkharbanda/Sites/www.yourname.comGet the permissions for the directory as the user with
sudo chgrp -R staff /users/rahulkharbanda/Sites/www.yourname.comand
sudo chmod -R ug+w /users/rahulkharbanda/Sites/www.yourname.comremember we had also done this in the steps above
We will enter the same directory before we download the WordPress files in that
cd /users/rahulkharbanda/Sites/www.yourname.comOnce in the Directory, we will download the core package :
wp core downloadSuccess: WordPress downloaded. This will what you will see once download is done it takes around less than 10 seconds.
Configuring WordPress New Install on Mac
This is an important command as it will connect the database with the config file, i assume you are in the same directory as in the previous step
wp config create --dbname=wp_local --dbuser=root --dbpass= --dbhost=127.0.0.1I have just added my database name as wp_local, the user is “root” password is “blank i.e no password is used here” everything is same as in the sequel pro connection window we have used.
this above command will return with “Success: Generated ‘wp-config.php’ file.”
sudo nano /usr/local/etc/httpd/extra/httpd-vhosts.confhere in the virtual host’s file, I am just adding the /www.yourname.com to my virtual host, nothing else will be changed, only in the DocumentRoot, not the directory as my main directory is the same /sites.
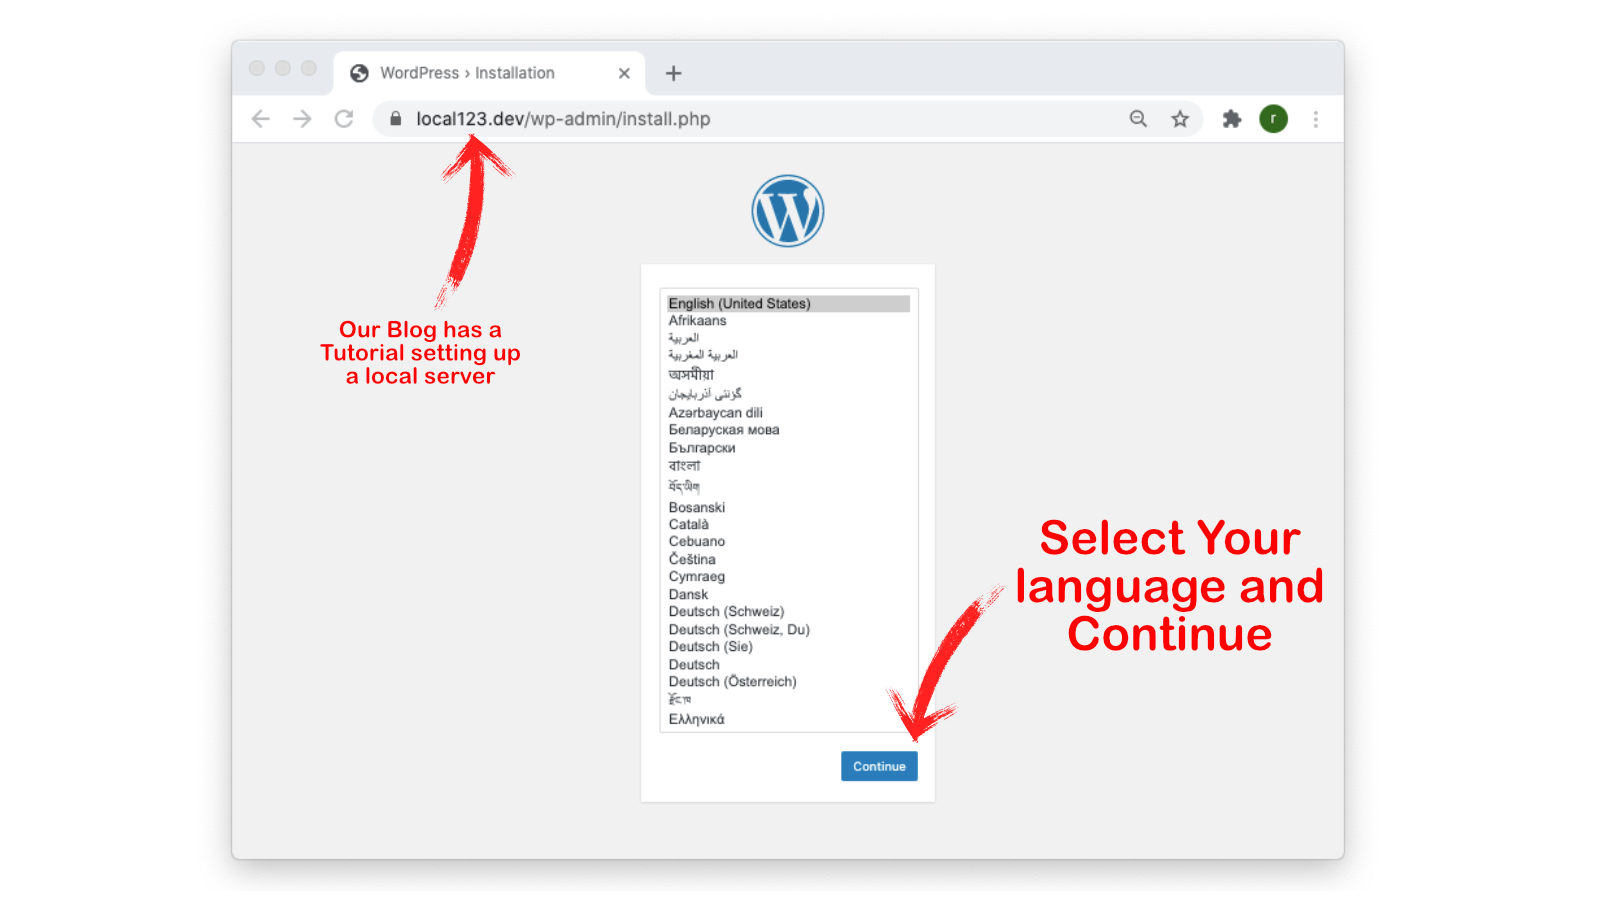
All done now simply head towards the domain as http://www.yourname.com
Hurray this is done and WordPress on mac setup is completed
Select your language and get going with your brand new WordPress project without spending a single penny on the hosting before you are ready to launch and go live.
Follow my next posts where we are setting up WordPress further.