Repair Database Easily on WordPress, With an Inbuilt Core Function,
Has your website been attacked with a Malicious code?
If yes, this small tutorial on Repairing Corrupt WordPress could help you get it back just in a matter of 5 minutes.
Just relax first. We have to do things step by step and get the site running back.
Understanding The Common Cause For WordPress Database Problem
First Lets understand how a WordPress plugin can destroy a live website and why you should not use any premium plugin that is not directly sold by the developer in one of my detailed posts here with the title as :
WordPress Premium Plugins Free or $5 Exposed not the right choice
The aim of the Attacker is on the SQL Database injection where all your queries get stored. A database contains important things like user passwords and credentials.
The effects could be felt with a sudden memory exhaust, or with a burst-able zone CPU usage over 100%,
thus bringing the website down and making the site owner helpless to login.
Another cause can be a non compatible plugin with your WordPress, a plugin that is recently installed and has some functions that conflict with your other active plugins.
Removing the Plugin Folder
The first thing you may do is, getting the plugins deleted that caused an attack or error you know that what recently you have installed.
To delete the same, you can remove the same with an FTP or SFTP access. If you use Lightsail, I have given a detailed post here on how to Connect Amazon Lightsail using SFTP.
On the terminal, you can always use the basic command. Here “Path” will be yours, You can remove the plugin folder with any size within seconds by this command.
Sudo rm -rf /your/folder/path
After the folder is removed next is to repairing the database.
Repairing Database WordPress Default Repair Functionality
WordPress has excellent code, repairing and debugging are the two essential database functions,
that are inbuilt in WordPress and are helpful for the Site Owners and developers to locate problems and resolve them,
so we will just put both in our configuration file.


First, we will open the Directory. You can do that with whatever, as per your hosting, I am more comfortable on the Terminal and SUDO editor.
so once inside the WordPress directory, its sudo nano wp-config.php
Here are the two lines you need to add to the wp-config file :
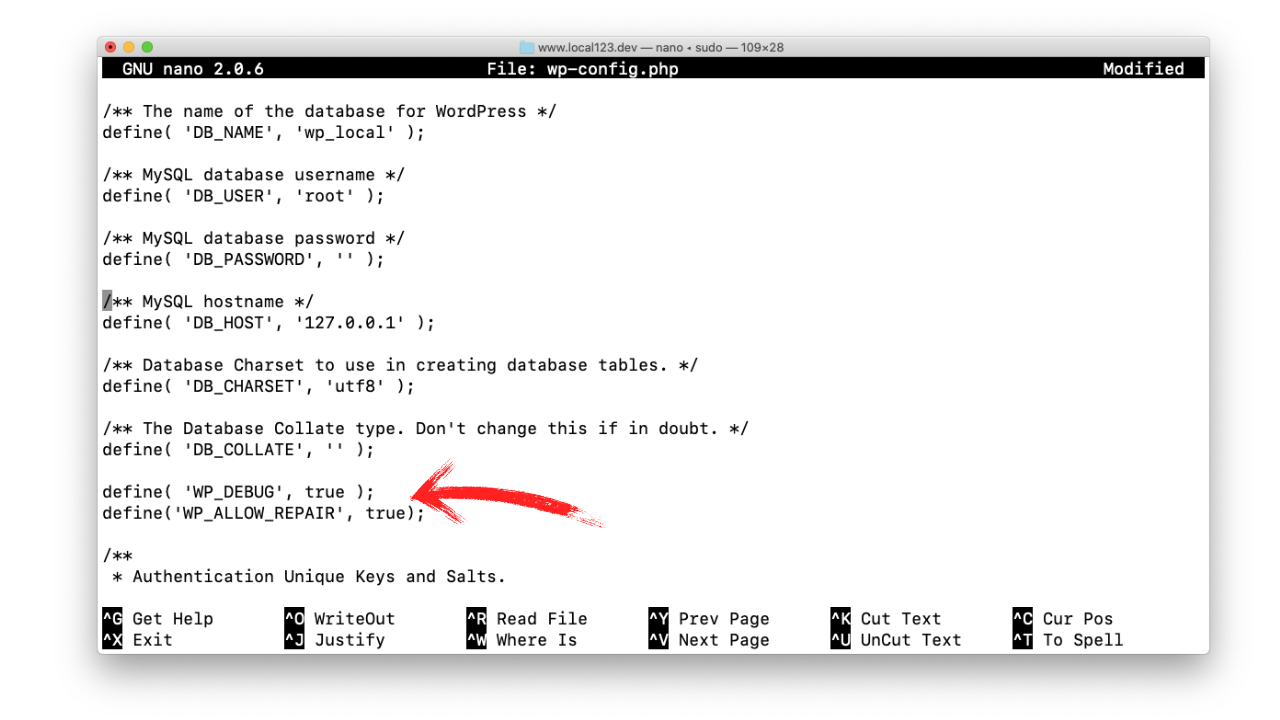
You can just copy these two from here :
define('WP_ALLOW_REPAIR', true);define( 'WP_DEBUG', true ) ;
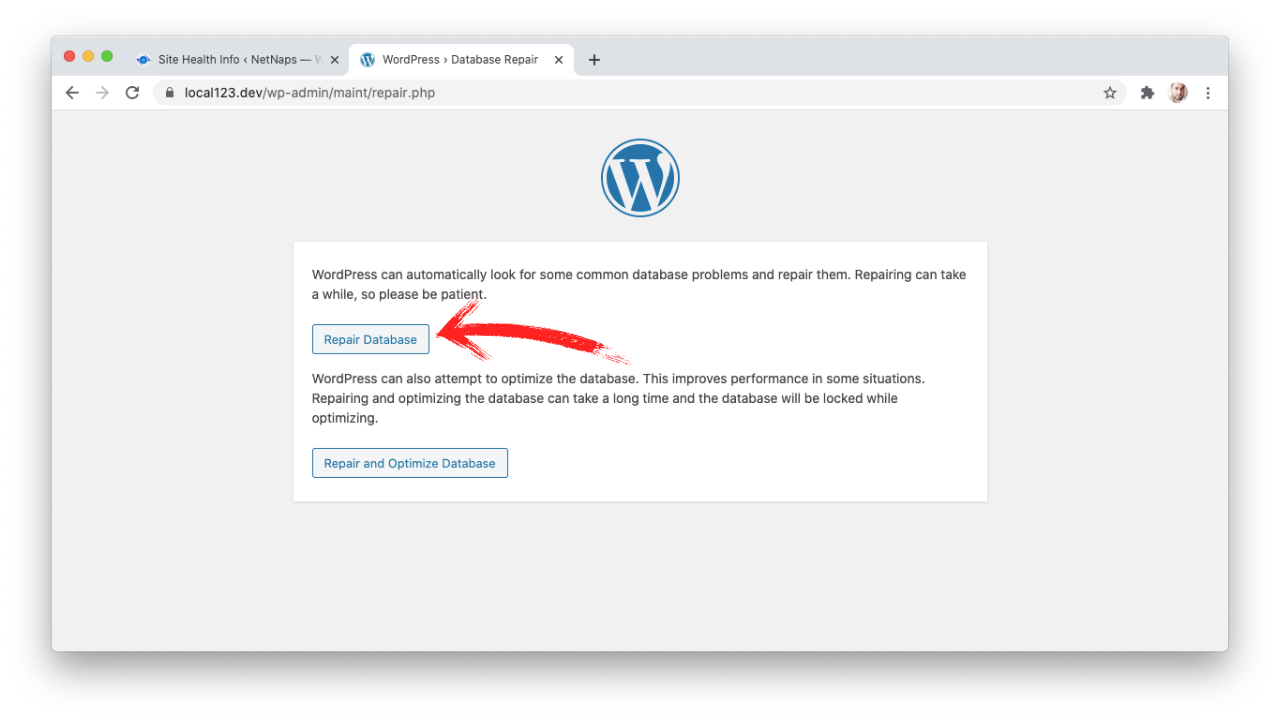
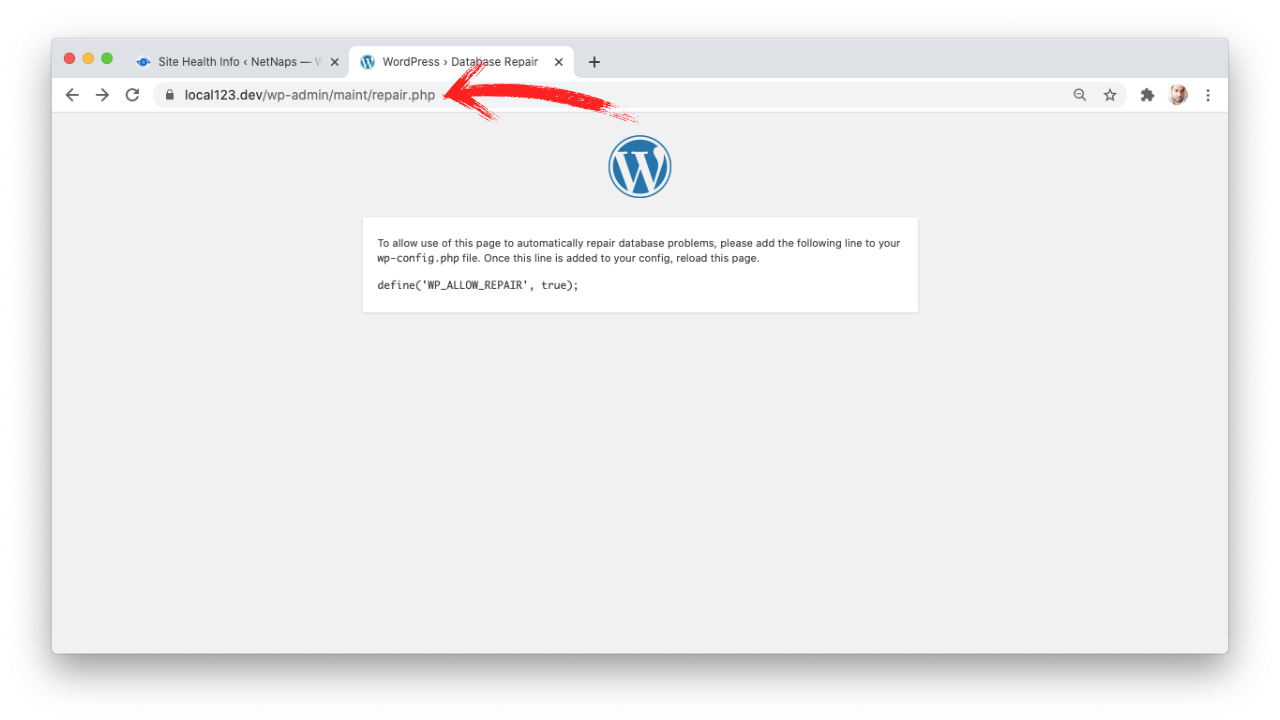
Once done you can just use this URL by adding your domain like in the picture above the url is :
https://yourdomain.com/wp-admin/maint/repair.php
Now Click on the Repair Database option
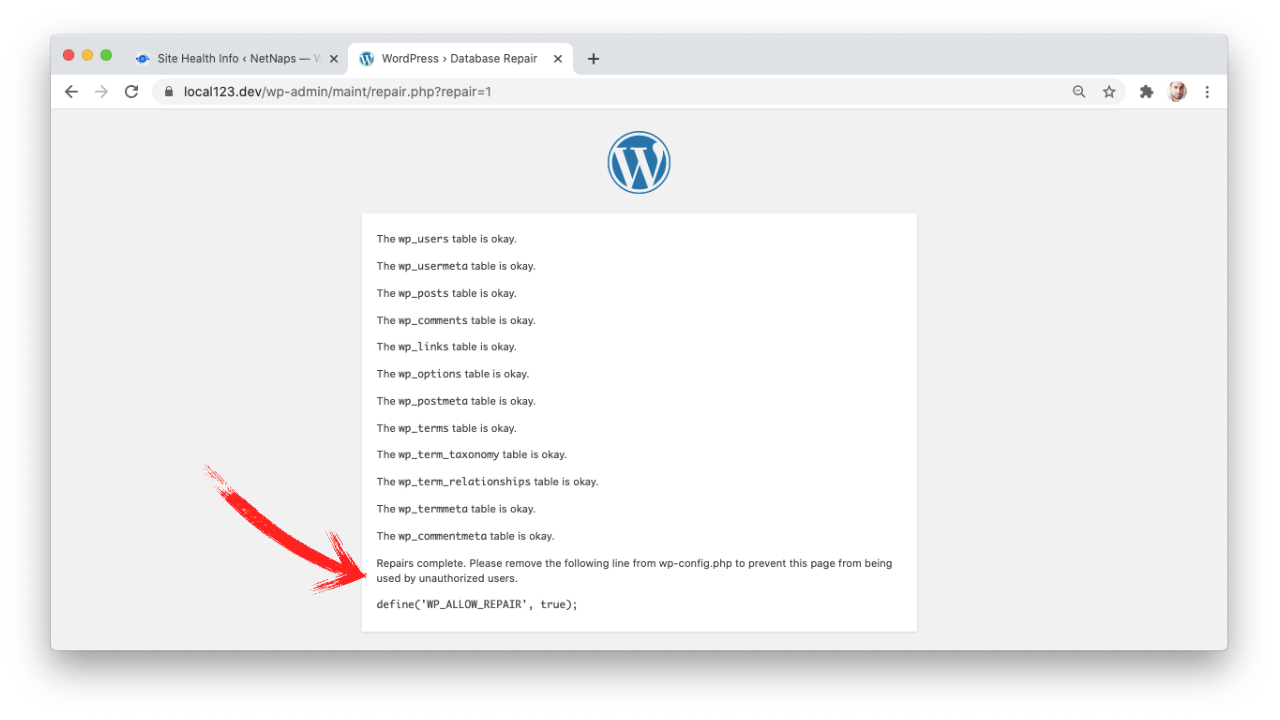
Once done it will ask you to delete the Code, from WP-CONFIG, so you can just comment the code like this to use the same in the future :
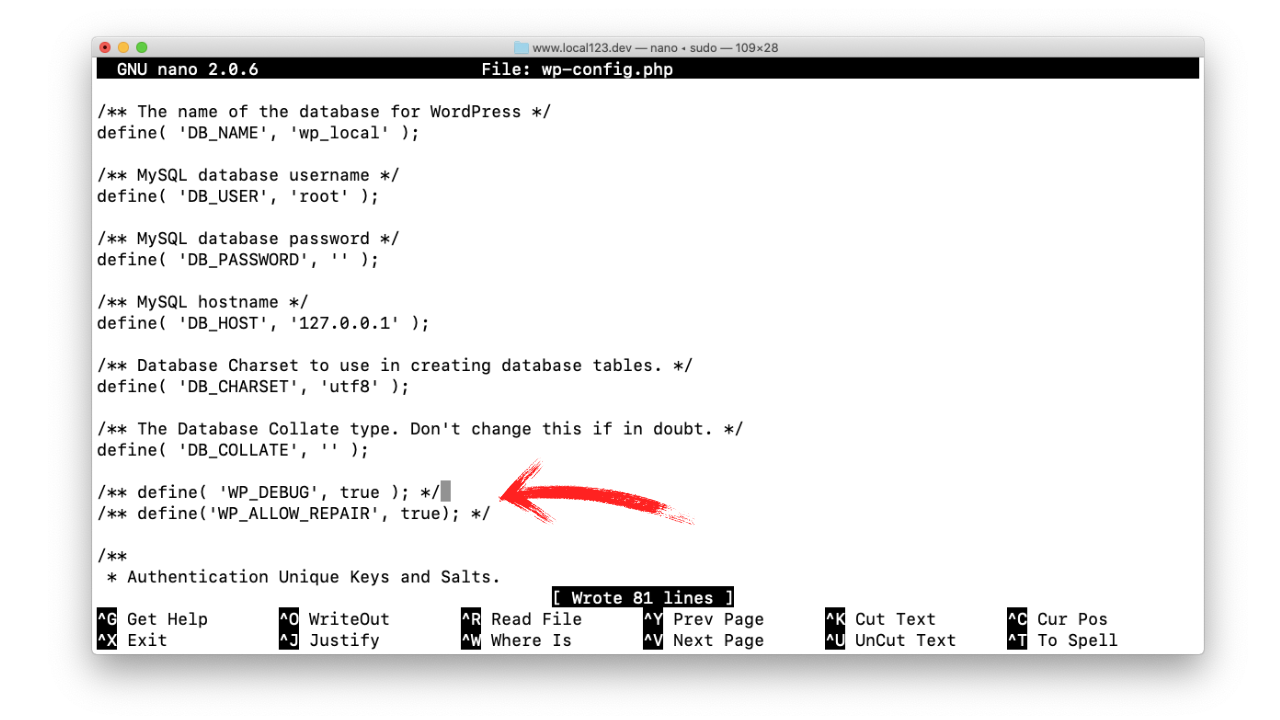
I also made Debug true as if any error prevails can be seen,
Next, once you use the same URL for repair it will show :
The Database is Repaired !
Cleaning Up Unused WordPress Tables With Garbage Collector Plugin
Plugins you install and delete, certainly leave back files on your server, that files are SQL Tables folders and settings.
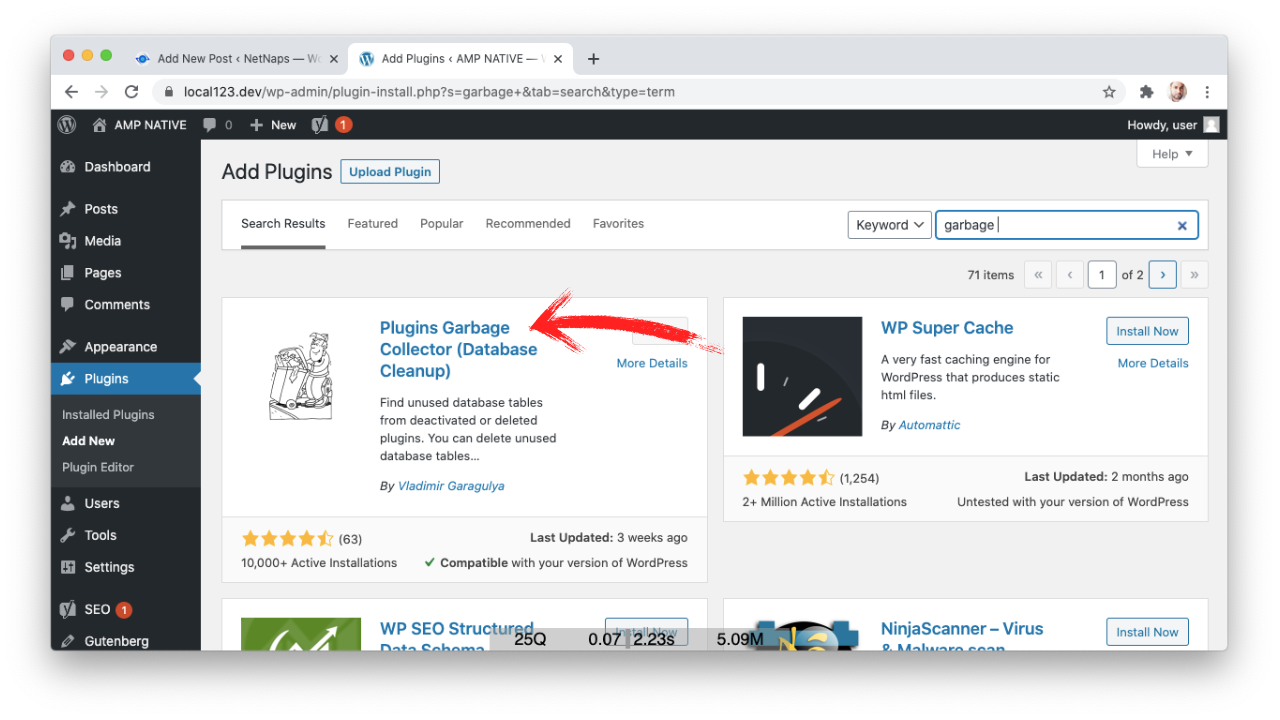
For cleaning them completely you can go ahead and install this plugin called Plugins Garbage Collector (Database Cleanup) by Vladimir Garagulya,
This Plugin Helps with unused Database Tables For Cleaning Folders, you can do with FTP manually like FileZilla.
This Plugin is 100% Free to Download form the WordPress Repository
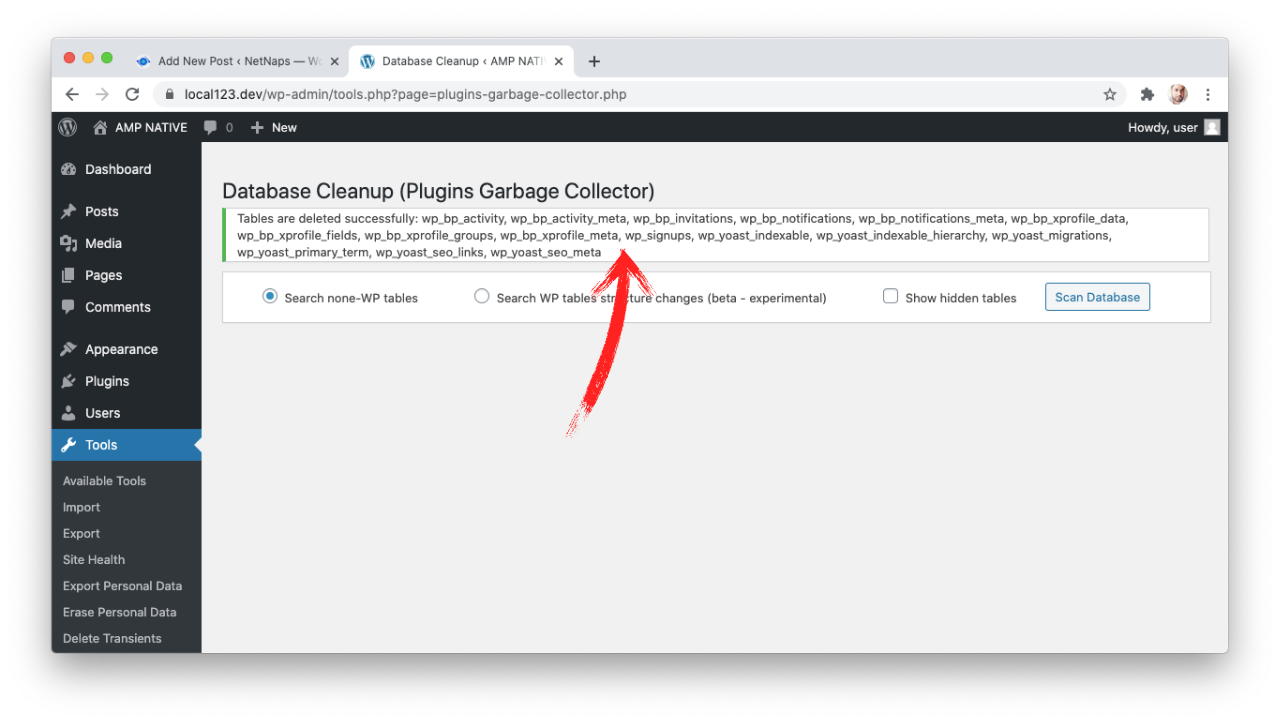
Just go to Tools > Database Cleanup
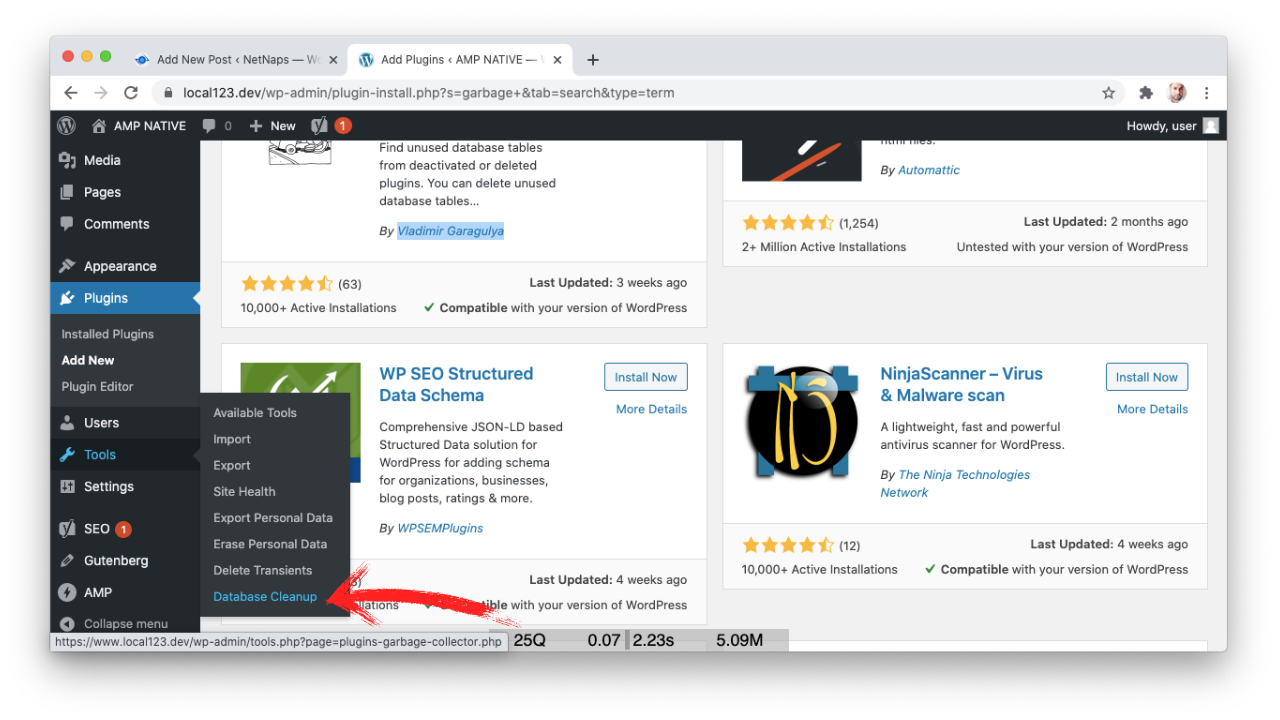
Select the Options to SCAN Hidden Tables also
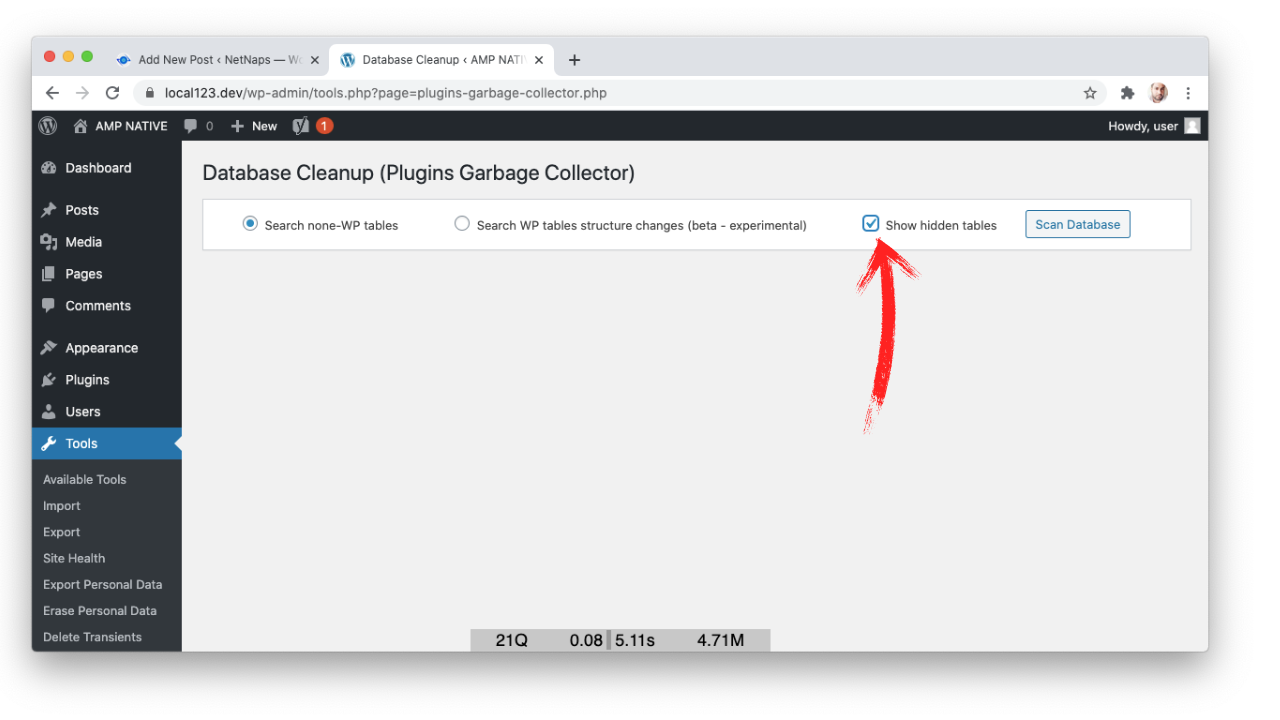
Go ahead with the SCAN of the Database, this will show you within few seconds what tables are created that are unused.
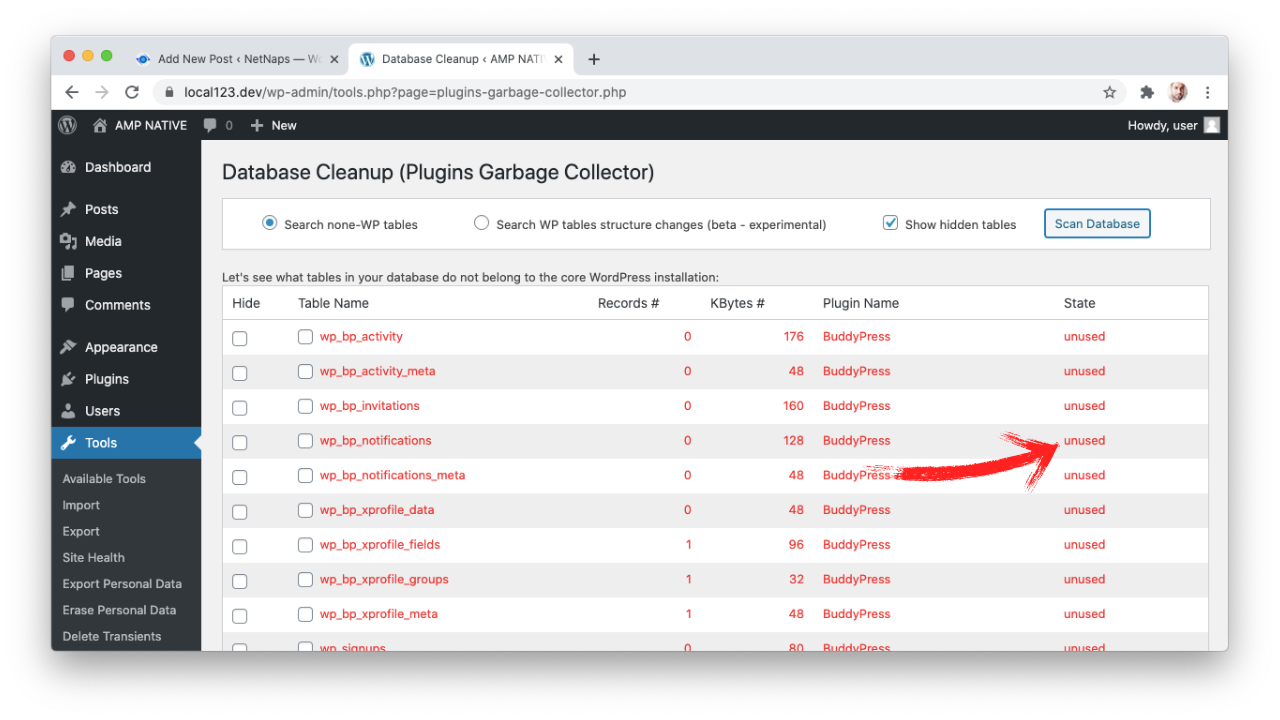
Now just select these tables in the RED, and scroll down to an option DELETE, and done!
You only have to select the 2nd Column, the first selection Hides the Table.
Like in this picture here :
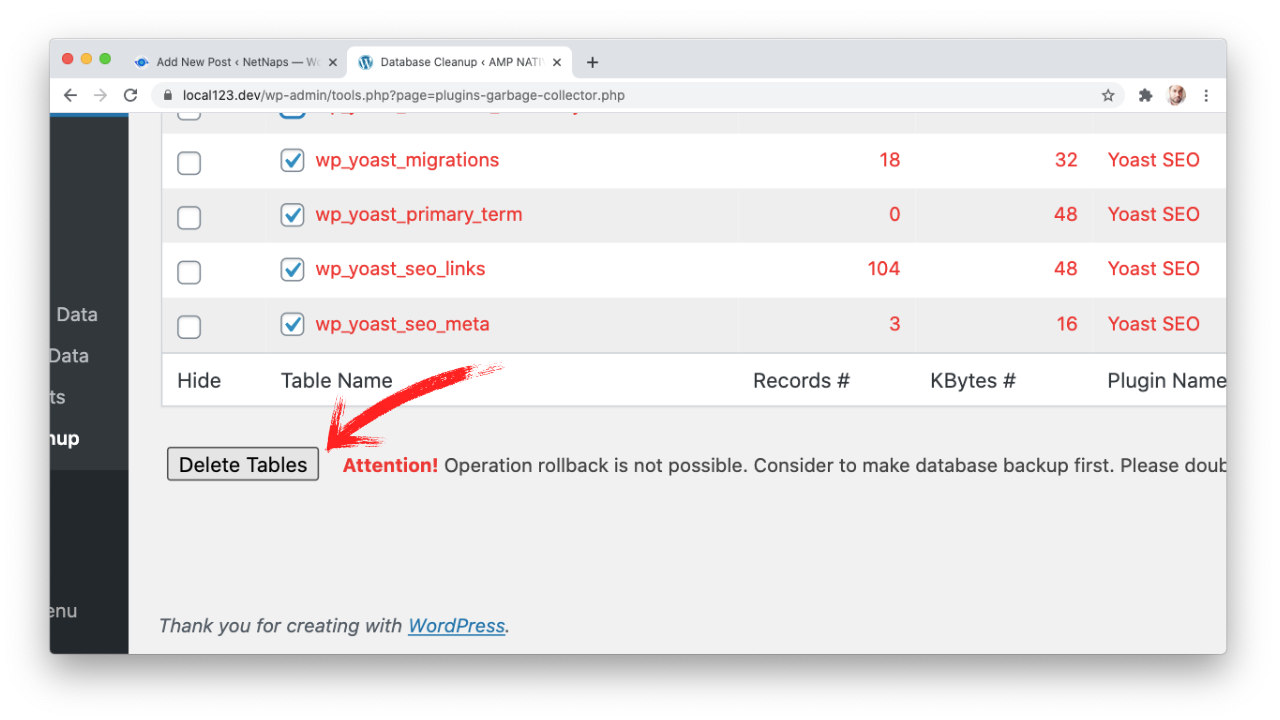
Click on delete it will delete the tables.
After this function, if you do not regularly try new plugins on your live site, delete the same plugin as it won’t be of any use.
Its always recommended using the plugins as less as possible as every plugin consumes scripts, CSS, queries, and eats up the server resources.
Once it deletes the same, you will get a confirmation like this.
After that, you can rescan the same to confirm the same.
If you are using a cloud server, VPS Hosting and want to connect your database on a local machine kindly read my post Connect Remotely AWS Lightsail MySQL Sequel Pro on macOS in 5min.